Sunday, 26 January 2020

50 Years (Plus!) Apollo 11 commemoration model

I occasionally tend to take breaks from my wargaming and figure painting so my first post of 2020 is a modelling one. Many will surely remember how last July the world celebrated the 50th anniversary of the first moon landing and as a bit of a space buff I was planning to complete a commemorative model by the anniversary date. However, I miserably missed my deadline partly because I dragged my feet and partly because I had to wait for some badly needed parts for what seemed like an eternity. So project completion slipped further and further until I finally got around to finish it off a couple of weeks ago.

I will not delve much on the actual event itself as I am sure most would already be familiar with it. In a nutshell, Apollo 11's lunar lander named 'Eagle' touched down on the moon July 20th 1969 at 20.17 UTC. (Much to my chagrin I just realised that I have the wrong date on the model's base plaque - need to change it asap. Sorry about that!). A few hours after touch down, Neil Armstrong crawled out of the exit hatch, climbed down the landing leg ladder, and after a few moments stepped out on the lunar surface. I attempted to capture that particular moment with this model.

The model itself is an Airfix 1:72 kit which I got off ebay a few years back.  The kit is still the same original seventies product and is quite lacking in detail, the most noteworthy being a complete lack of aluminium foil with which the lower landing stage of the vehicle is wholly covered. The thruster struts attached to the lower stage were also missing and had to be built from scratch.                         

The kit also includes a lot of surface scientific instruments which clutter the small round base of the model. So I removed everything, filled in the 'footprints' moulded into the base and opted for a single astronaut (Armstrong) about to step off Eagle's landing leg and utter the historic 'One small step' phrase.


Friday, 27 December 2019

Peninsular Spanish in 6mm

To complement my British Peninsular units I am mustering some Spanish and Portuguese units.  Actually, the word 'some' is a bit of a misnomer since the unpainted lead I got recently from Baccus is anything but ! Anyway, this week I got eight Spanish infantry stands off the painting desk, just shy of a hundred figures, representing the 7th 'Zamora' line regiment with black facings and the 8th 'Soria' regiment with purple facings. I am not aiming for any particular historical scenario so I am choosing units at my whim.  Unfortunately Spanish army organisation was quite chaotic between 1805 and 1812 and OOB's are rarely complete and accurate so it is quite useless to invest too much time in researching in too much detail as very often there is none to be found ! I am mostly using Steven Thomas's excellent site at https://balagan.info which contains a wealth of information on Spanish army uniforms and organisation during the French invasion and the Peninsular War.

As usual, units are based for Age of Eagles on bases 3/4"frontage by 1" depth with twelve figures to a stand.  Baccus come in strips of four so they fit in almost exactly to one base frontage. 
 
There were nominally three battalions per regiment in 1808 but there was no such thing in real life and no more than two would actually see the field.  The first battalion would have two grenadier companies which would sometimes be hived off (as per the Austrian model) into separate units and the rest of the battalion would then join other fusilier units orphaned of their grenadiers into ad hoc formations.  To mirror this as much as I could I put one stand of grenadiers for every three of fusiliers - this should give me the ability to muster the grenadier stands separately if necessary. The figures shown wear the 1802 / 1805 model uniform with bicornes and white jackets in regimental facing colours while drummers wear blue jackets piped in red. Officers carry a crimson sash, presumably to impress the senoritas !

Apart from the regular units there was a plethora of irregular militia and guerilla units, mostly in civilian clothes or brown jackets.  Information on such units is sparse, however, and honestly it is doubtful how useful such units would be on the wargames table so I am not sure if it is worth going into much depth in this area.
Units in line - 'Zamora' to left and 'Soria' to right
Units in Supported Line - 'Soria' in front and 'Zamora' to the rear
 Each regiment carried a king's colour (foreground) together with battalion / regimental flags


Wednesday, 25 December 2019

A short Christmas post

Just a short post to wish you all a merry Christmas and a great new year. I know it’s kind of cliche’ but there you go......

Oh, and happy gaming and painting throughout 2020.

Keep well eveybody and God bless. Thank you all for your readership, comments and support.

Monday, 16 December 2019

Baccus 6mm British Peninsular Army

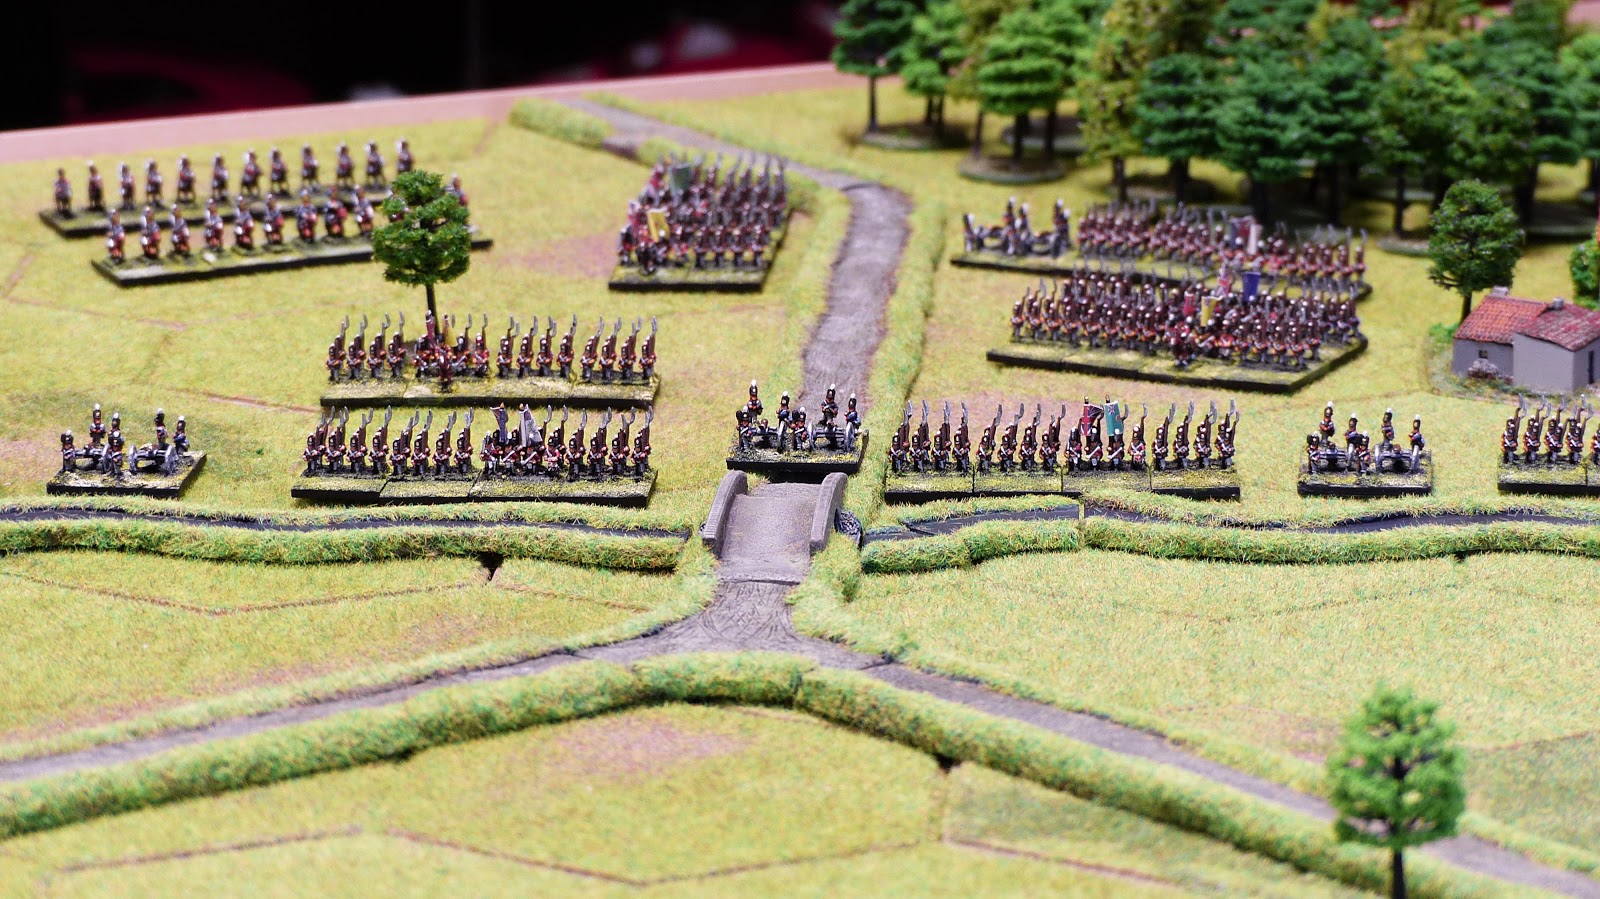
These past few weeks I have been mustering a 6mm British Peninsular army from Baccus.  Painting sessions have not been too regular but I am finally in a position to field a small army for Age of Eagles (AoE in short). I managed 54 infantry stands, eight artillery batteries, and 16 cavalry stands.  At AoE's scale of 360 infantry and 180 cavalry per stand, this would translate into a small army of 19,440 infantry, 2,880 cavalry, and 48 guns - each battery having 6 guns. In terms of figures, each stand contains 8 infantry figures and 3 cavalry figures, so with the artillery that's in the region of 500 figures, all told.

True to form, Baccus make very detailed napoleonic 6mm figures - it's amazing how they manage to fit in so much detail in such small figures - so hats off to Peter and his team for the quality of their product. It is a shame that they are pretty much larger than Heroics and Ros so they are not really compatible but to be honest this lack of compatibility doesn't show that much once the figures are on table. 

Although AoE is brigade level and doesn't really go into the nitty gritty of lower organisation, I still opted to organise the troops into battalions (two stands = 720 men), with four stands to a regiment at 1,440 men.  I made this choice mainly because of the various facing colours which distinguish the different regiments and their regimental flags. The result was a lovely array of coloured regimental standards accompanied by their respective King's Colours.

I staged a few photographs to give an idea of the finished figures.  There's still quite a pile to finish as well as a lot of Spanish and Portuguese to complement the Brits.  Maybe they will feature in a future post.  For the moment, however, here are the Brits that I've managed up to now, stovepipes and all.


Tuesday, 29 October 2019

Basement Gaming Room complete

I have finally gotten around to finishing my gaming room - it's been more than a year since I posted how my room was progressing and now I can finally say that it is well nigh complete.  That's the way we work things out here in the Med - slow and easy!

Anyway, I put in an 8' x 6' (4.20m x 1.80m) table which should be enough for most games in my preferred 6mm scale, even though there will always be the occasional scenario which requires even more space.  In such case I have enough space in the room to extend the table but for the moment an 8' x 6' will do.  I have the table covered in Kallistra hex terrain and am particularly pleased how their half hexes cover all around the edges to give the table a neat, complete look.

I fitted a few frames, two of which are really 1,500 piece jigsaw puzzles glued onto backing board and then framed.  Ages ago I got a Confederate Stars 'n Bars from a local camping shop (God knows what it has to do with camping!) which I pulled out of storage, had it washed by my better half and put on display at one end of the table. I also put in some old hifi equipment that I had lying around - a radio, amplifier and analogue turntable - after suitably having the lot reconditioned and cleaned. I don't mind having music going on at (very) low volume in the background. At the further end of the room I set up a bench to do my occasional airbrushing work.  It also doubles up as a workbench with some storage underneath. In future I hope to utilise the space beneath the table itself for even more storage as I don't feel I have enough at the moment. Before next summer I plan to put in an A/C unit or it would become unbearable down in the basement during the summer months. 

All that's left now is to start pushing tin and roll them dice......

The completed room with workbench at the far end. The two large frames at centre are jigsaw puzzles.  My 6mm collection is in the two cabinets on right. Still a lot of space to fill up in there !
From another angle showing hifi cabinet used for storage and display of some old diecast models.