Having finished the 54mm French Hussar (more on this in a future post) and not really having any particular thing going, a couple of weeks ago I decided to paint another Front Rank MAA just as a filler between projects. Rather than present the finished figure, I am posting a set of step-by-step pics showing the gradual build up to the finished knight. Now I know I’ve already done something similar in the past but I like presenting these kind of ‘tutorials’ in the hope that someone might find them useful or somehow inspirationanal. And it's my blog anyway, so there! All pics are taken by mobile phone so apologies for the low quality. Hope you enjoy anyway!
I failed to take pics of the initial phase but it is mainly black primer followed by a base coat of black brown for the horse and saddle. The caparison will be showing a rampant bear motif on a green field with a dark red border. The process kicks off by sketching a basic figure of the bear in brown earth. The first pic picks up from here. All colours Vallejo except for Games Workshop Nuln Oil wash.
 |
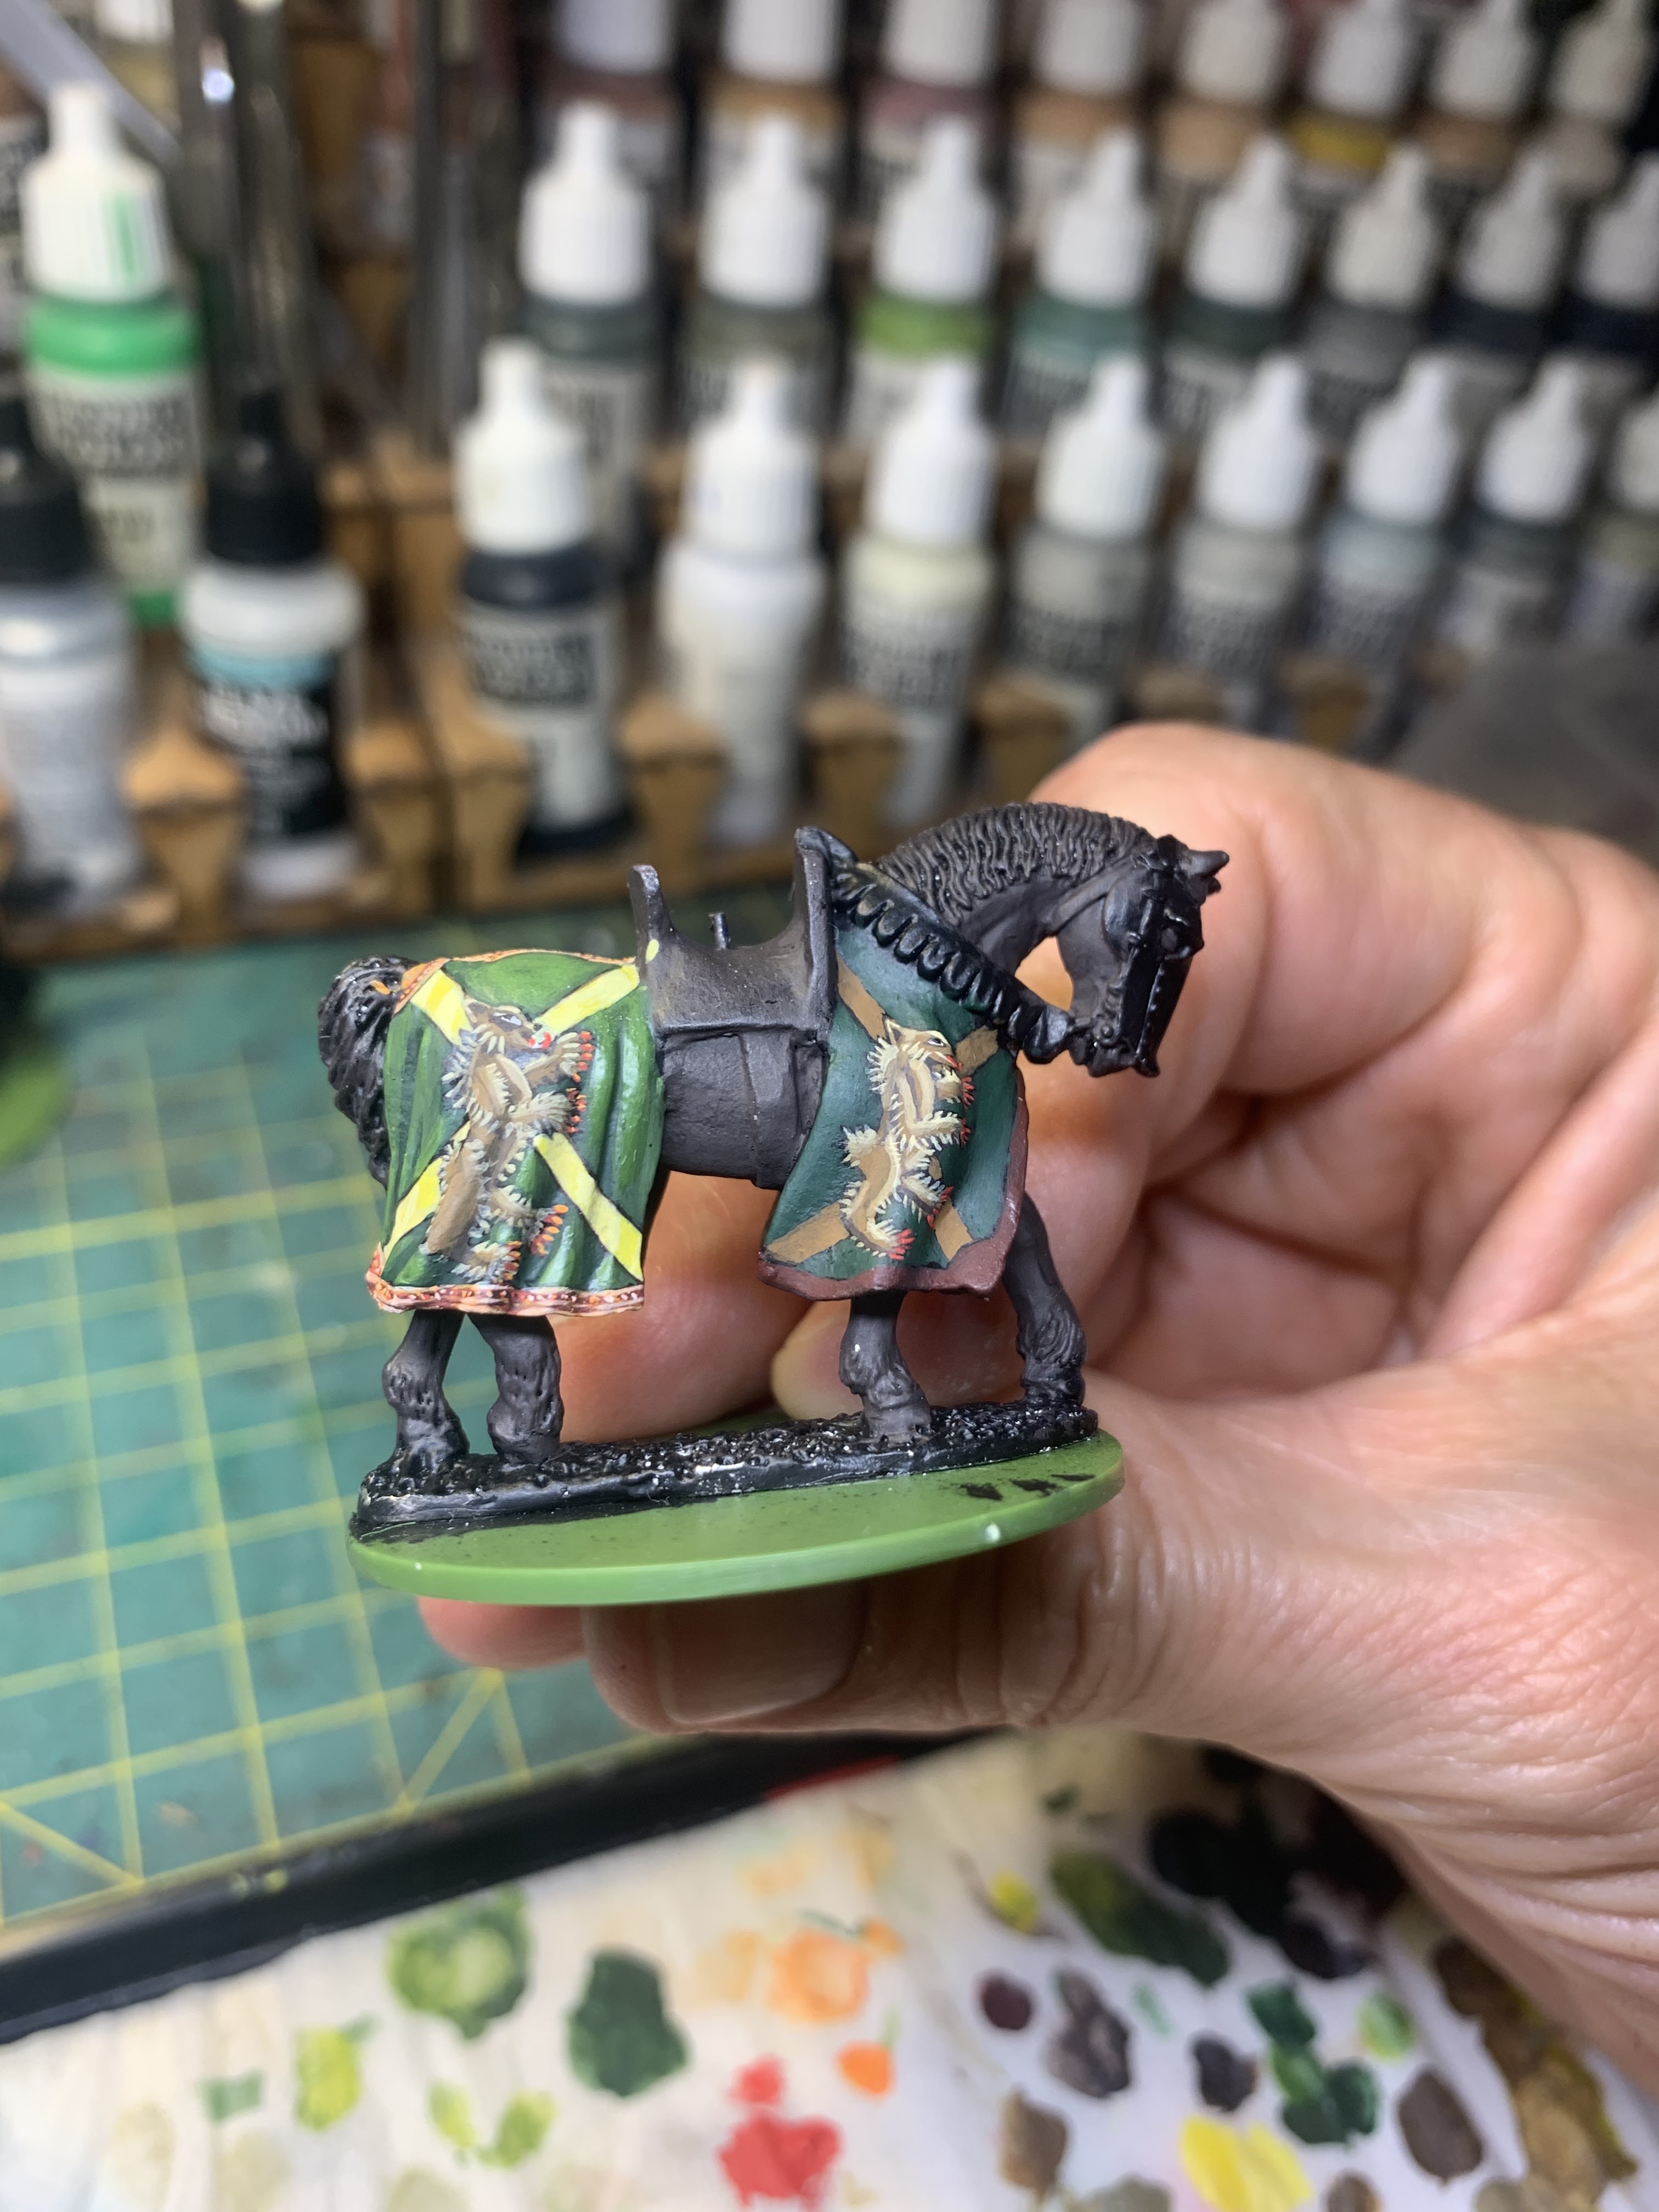
| The rampant bear on the right is filled in with details using a mixture of browns and buff on a field of black green. The border is black red. The basic sketch which forms the basis of the front of the caparison can be seen on the front quarter on left. |
 |
To create a separator between the rear quarters I created an ‘embroidery’ pattern with a petalled flower motif
|
| Once highlighted, the green field seemed too bare
(excuse the pun!) so I added a yellow cross of St Andrew. The
‘embroidery’ pattern is carried on around the caparison border. |
 |
| The front sinister quarter is completed but the bear resembles more of an otter! |
 |
| Starting dexter side now. Same process. Sketch, detail, field, border, and finally cross. |
 |
| Front dexter bear rampant detailled. |
 |
Field, cross, and border all base coated. I used brown earth as a base for the yellow cross
 | | Front caparison dexter quarter complete |
|
 |
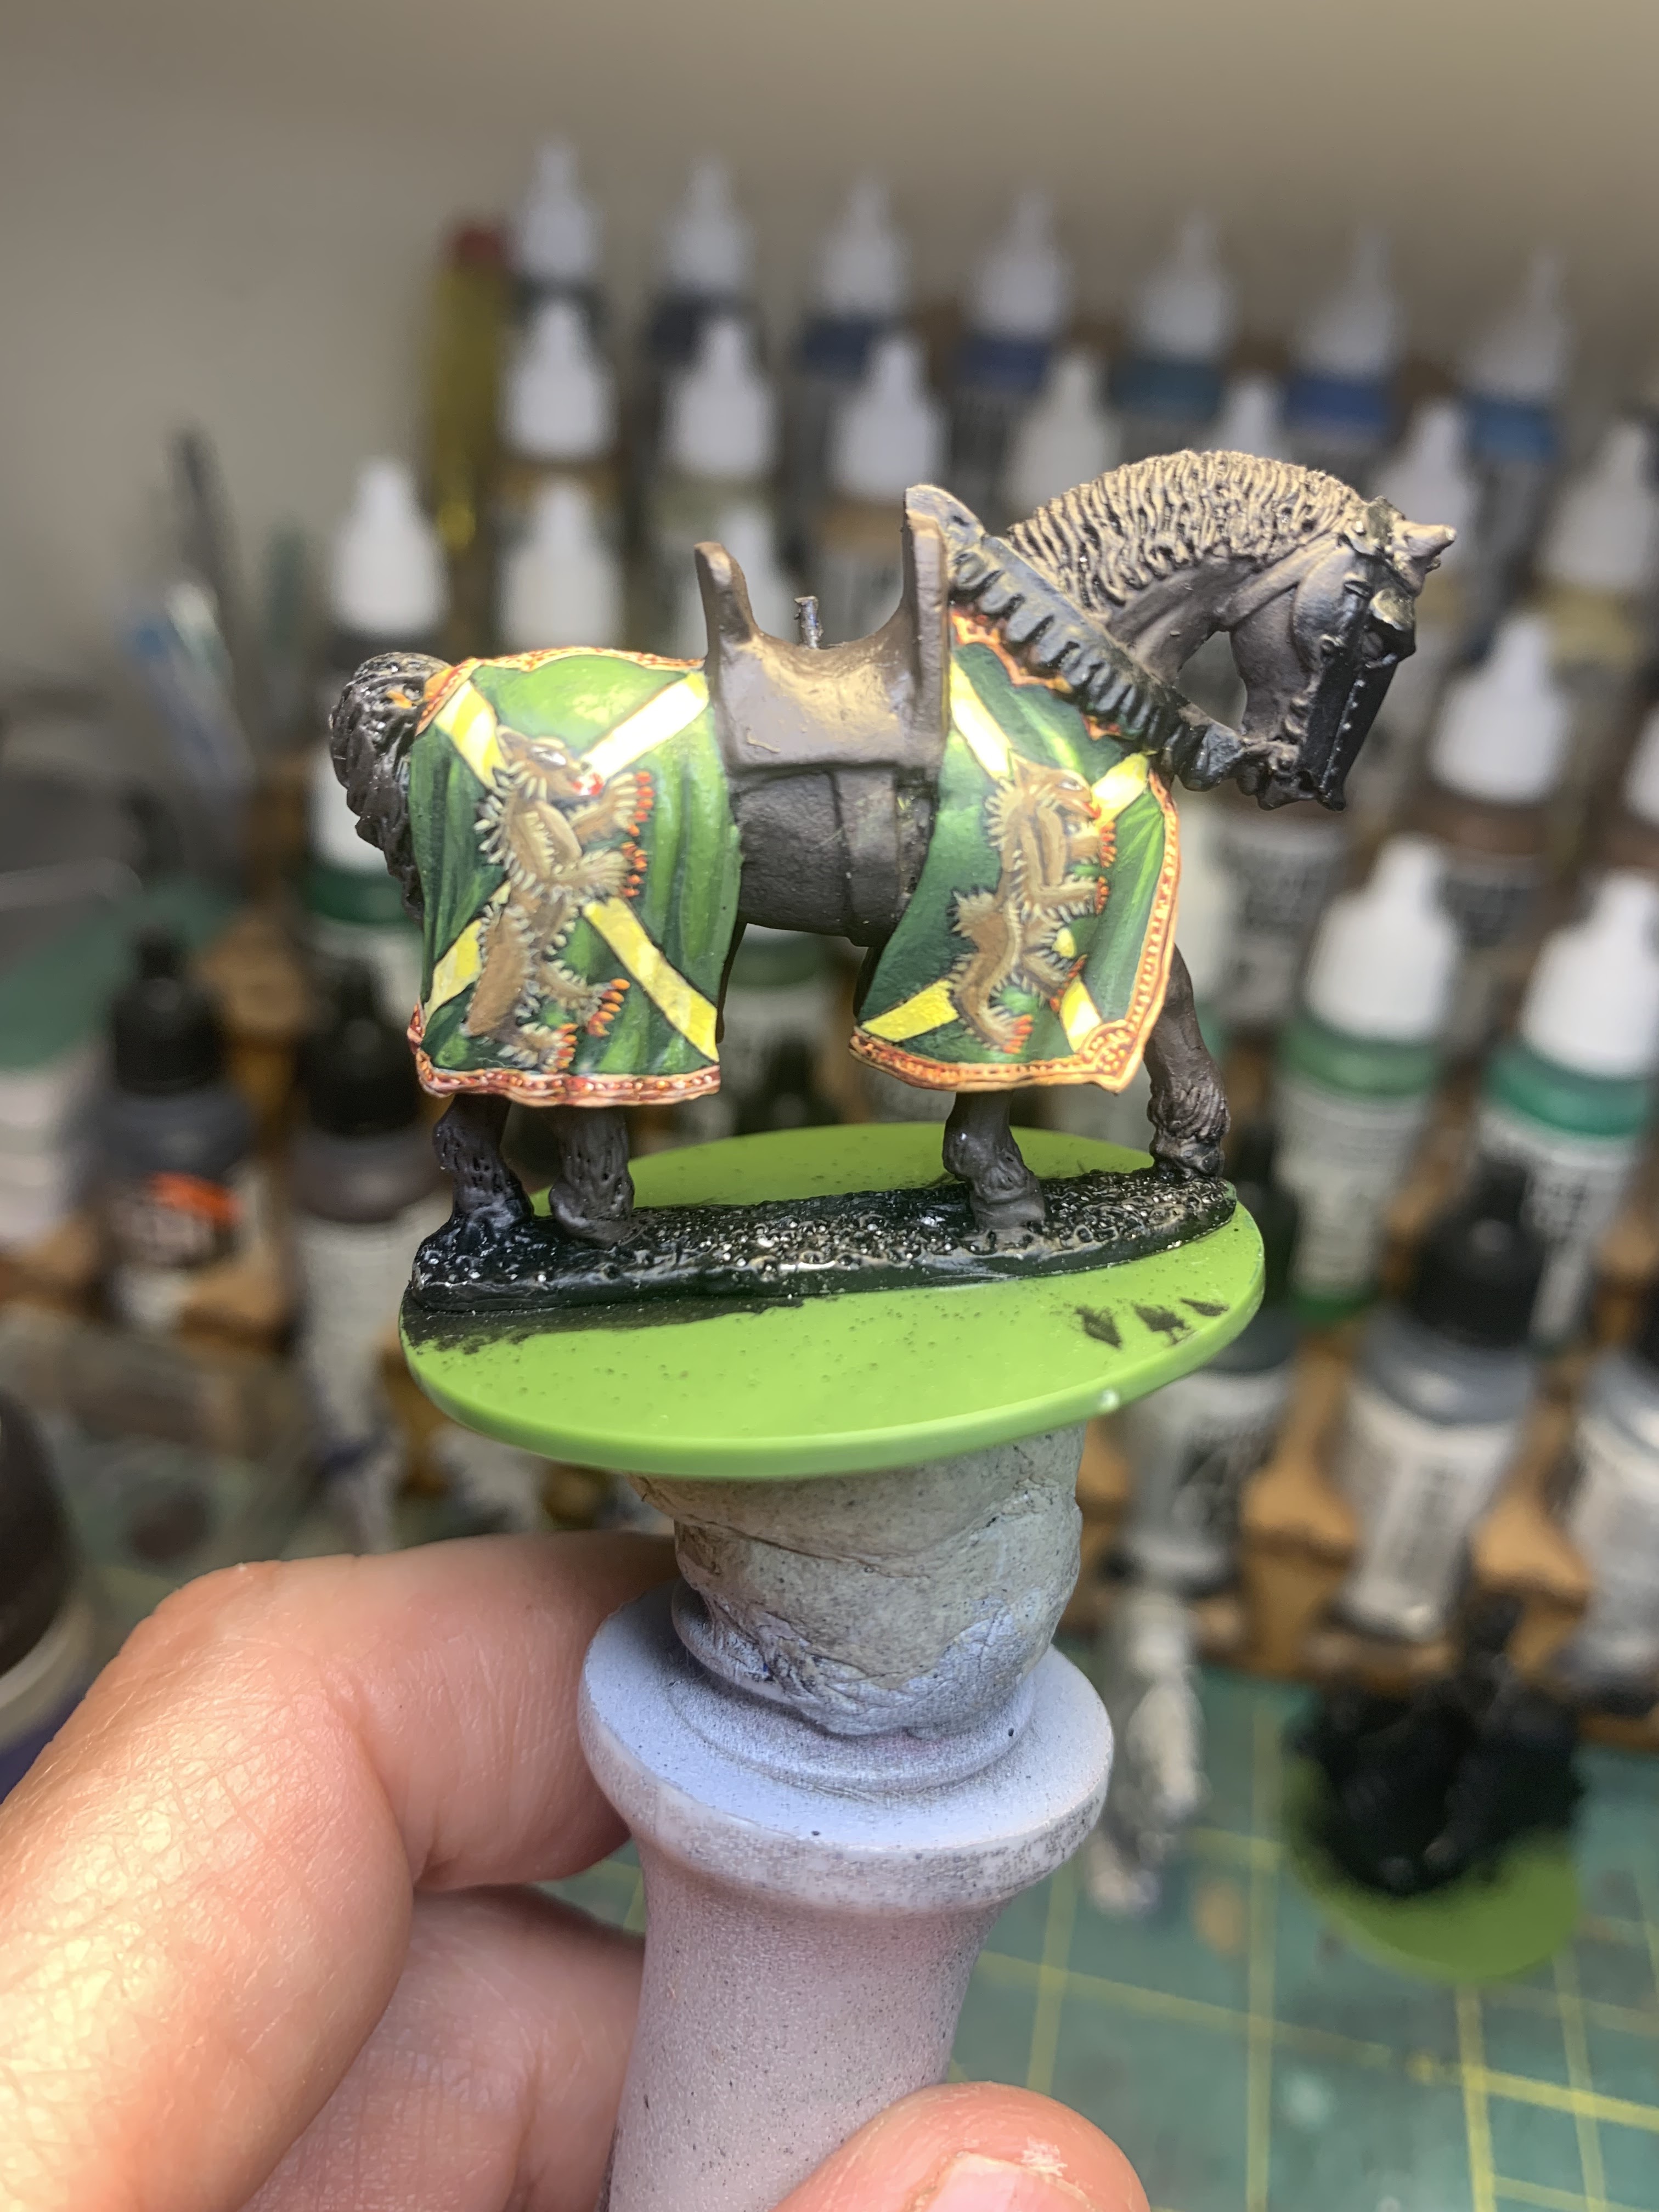
| A plant & flower motif is added to the interior lining of the caparison to make it look that little bit richer | | |
 |
| Front armour and main saddle strap added |
 |
| Same stage sinister (left) side |
|  |
| | I added some random curly patterns to the saddle to represent wood inlay. Armour washed in GW Nuln Oil
|
| |
 | Saddle 'wood inlay' rear view
|
| | | |
|
|
|
|
|
|
|
|
|
 |
Base is flocked and horse is complete. Note the saddle pin.
|
 |
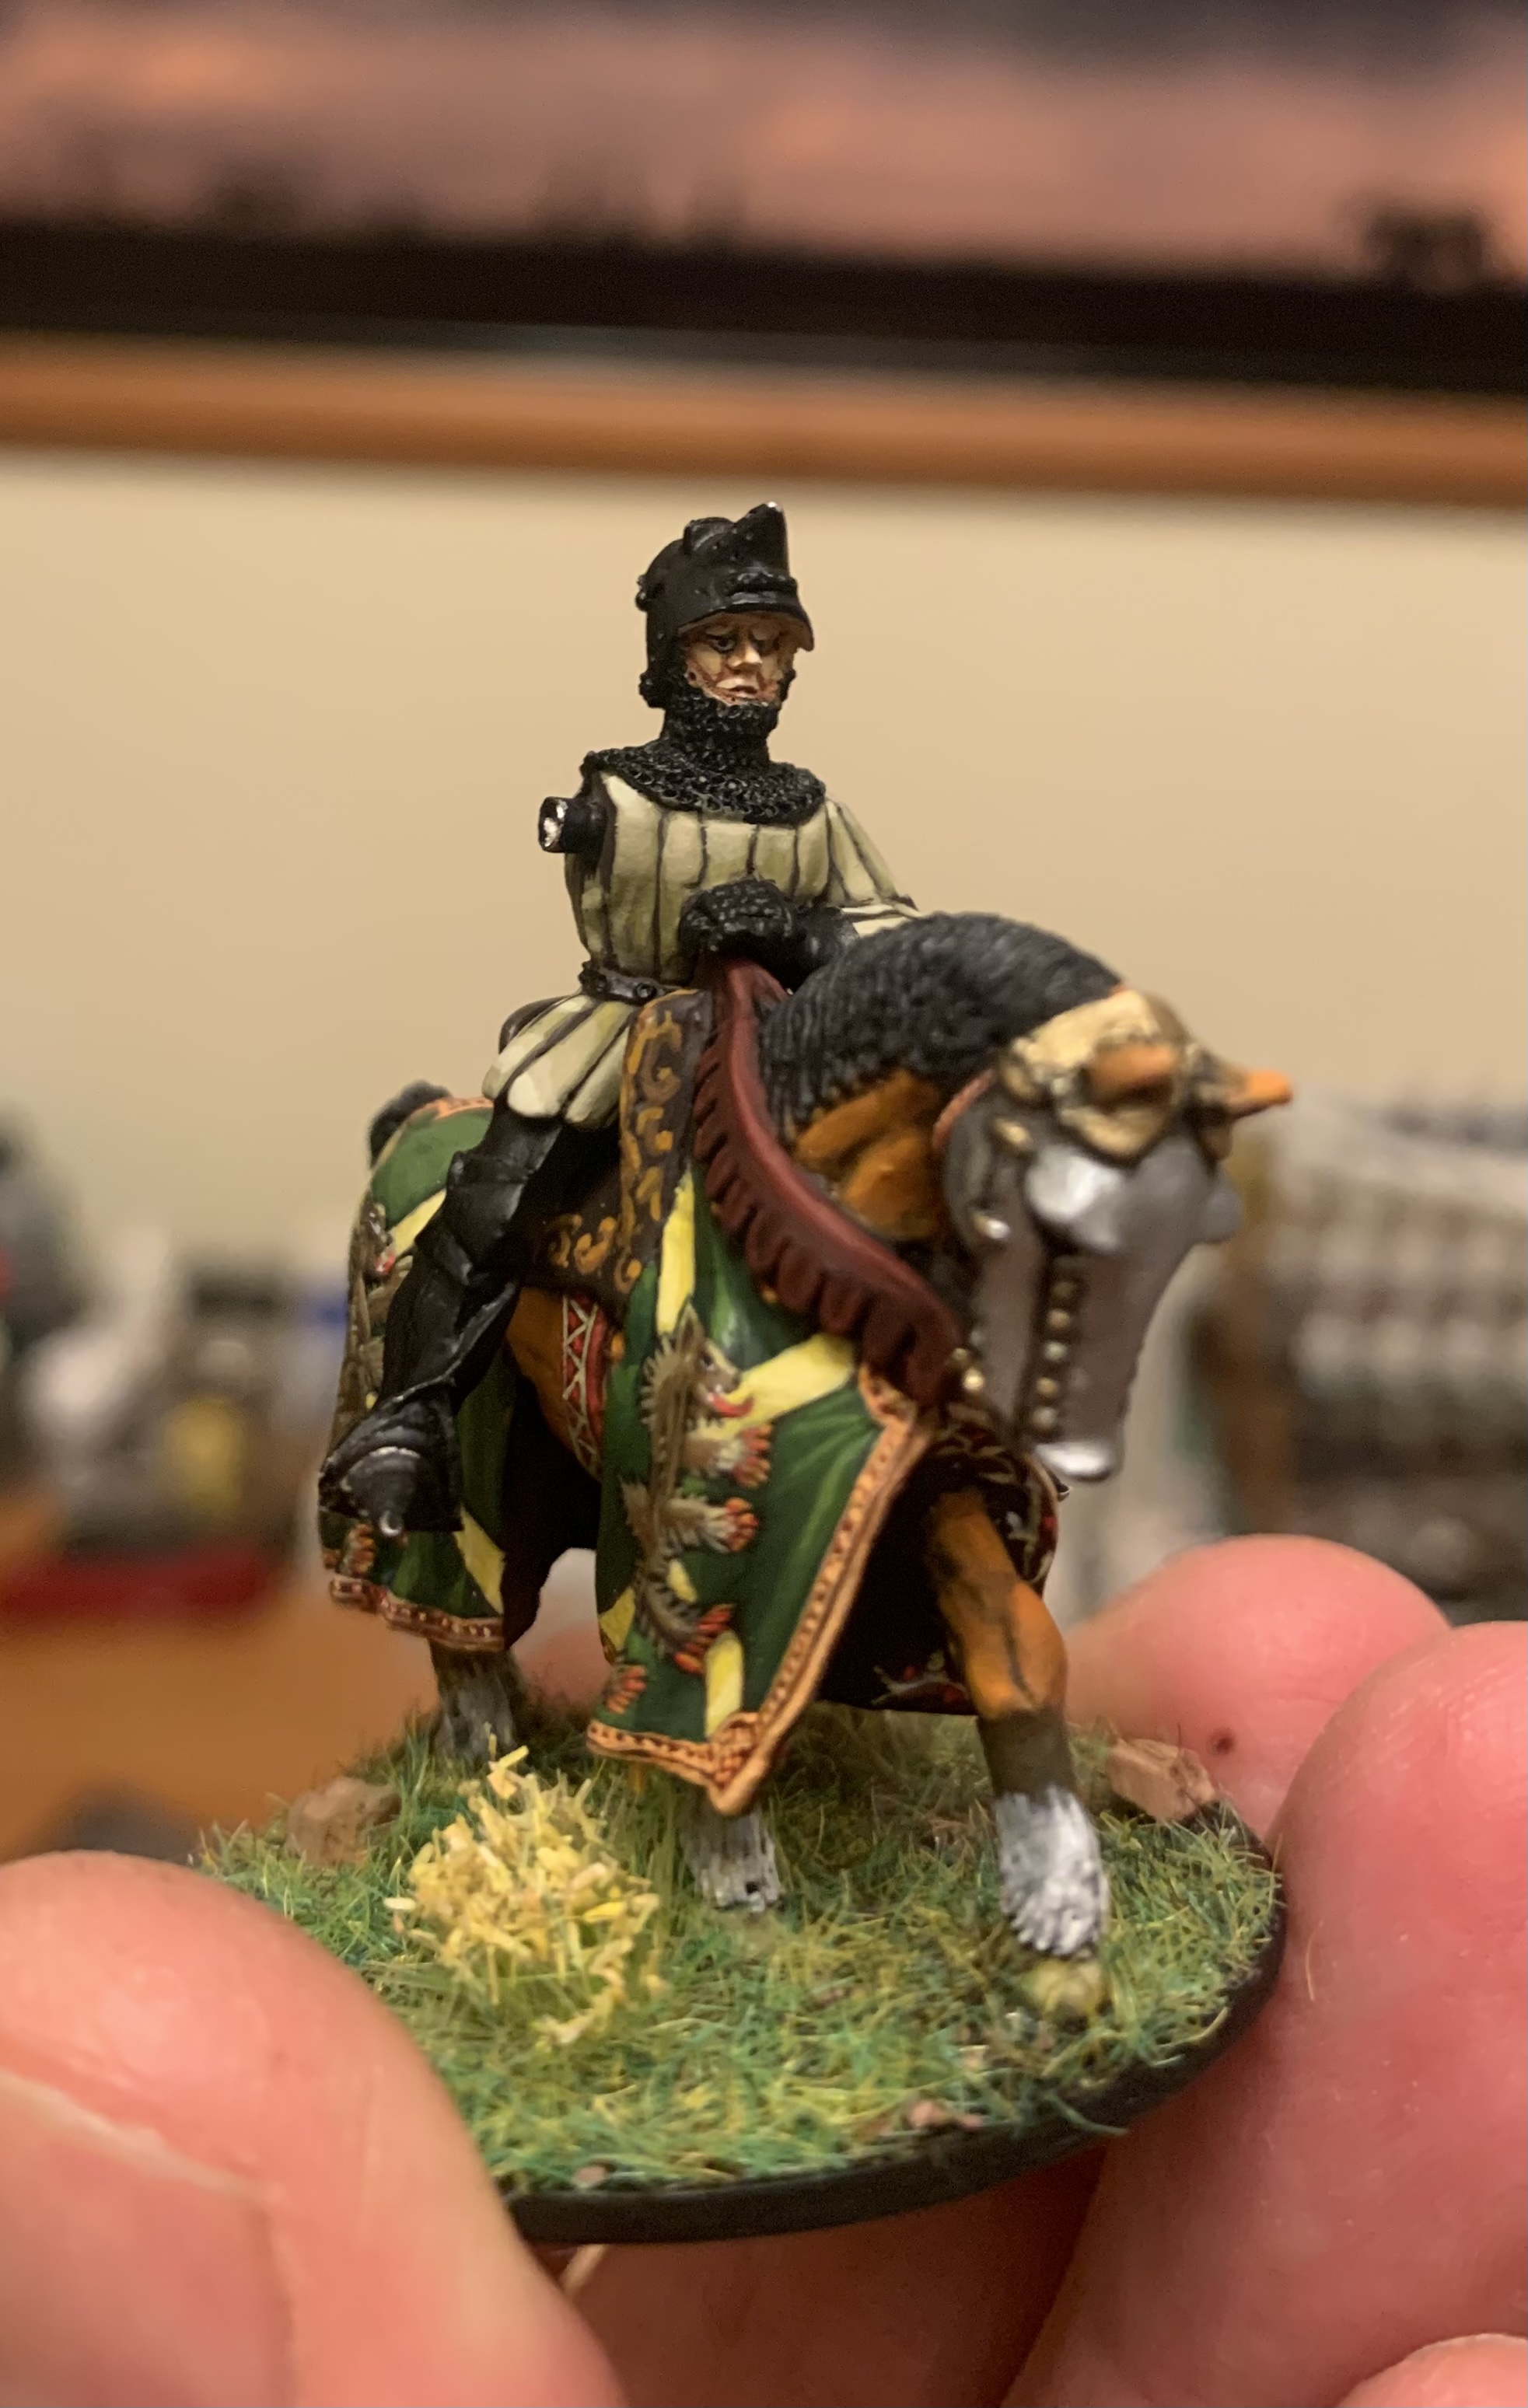
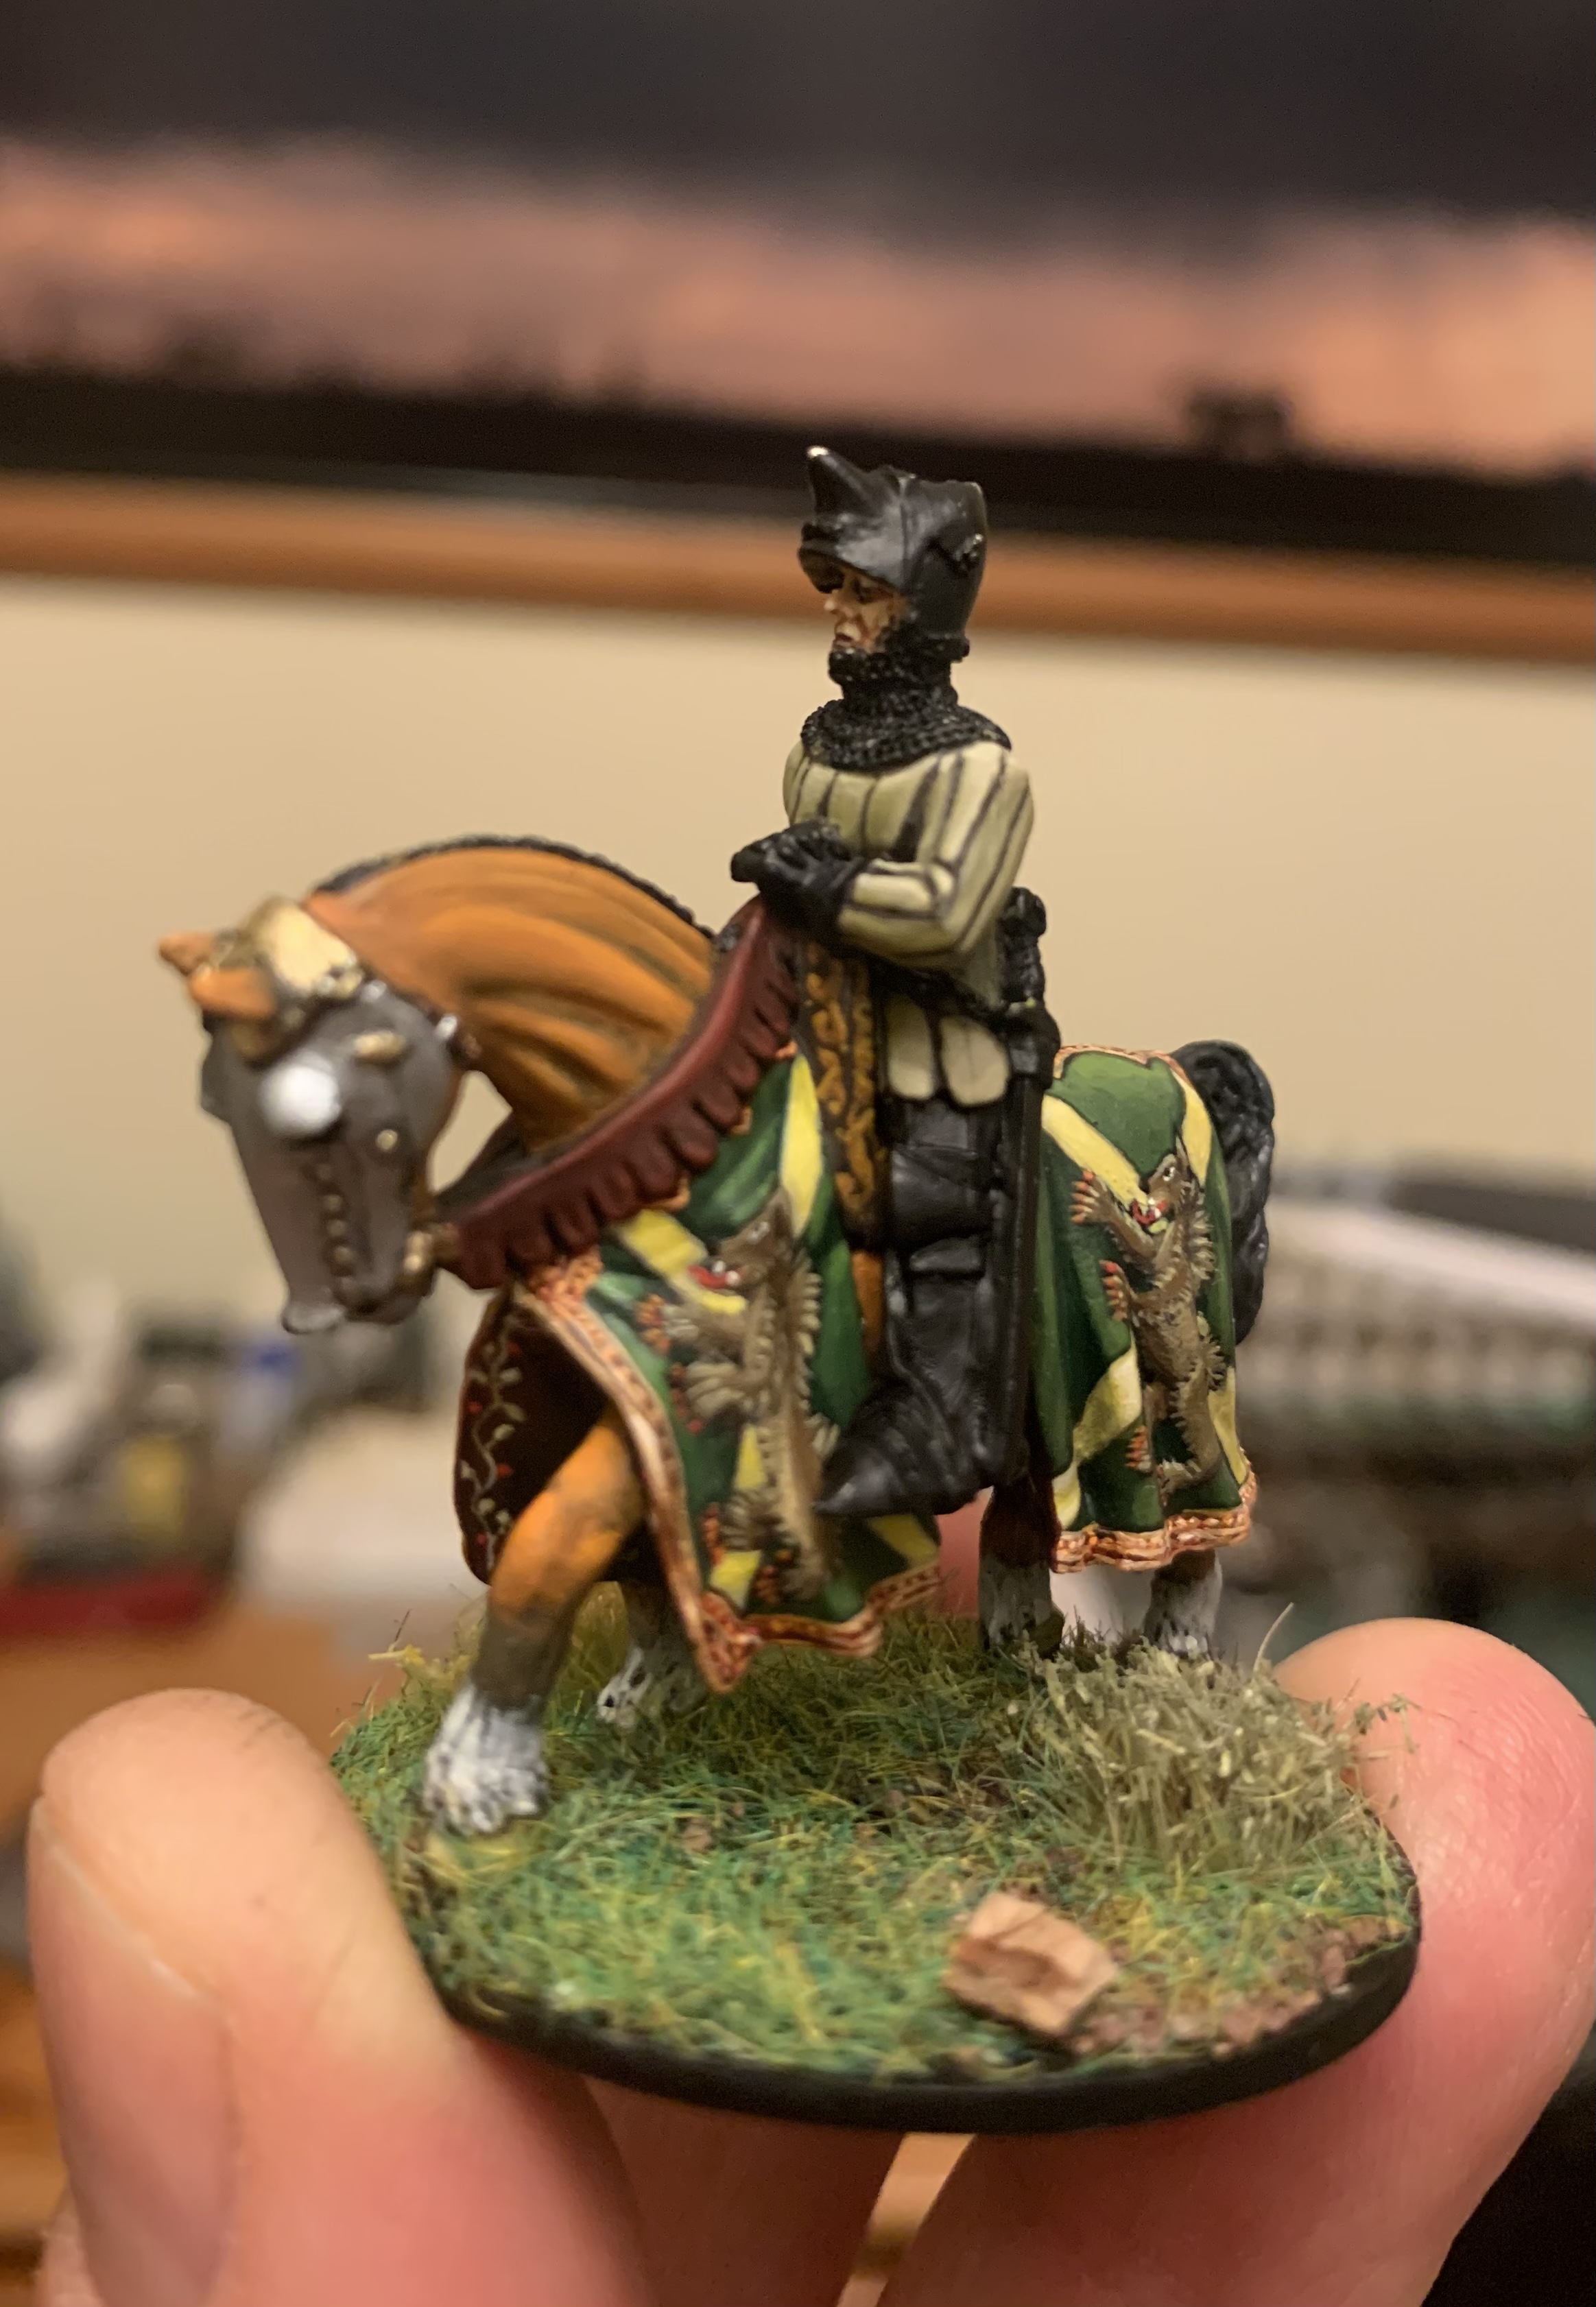
| Work now starts on the figure with the face and jupon. I went for a simple linen look so as not to elaborate the model too much. |
 |
Lance arm, armour, scabbard and all leather belts still to be done
|
 |
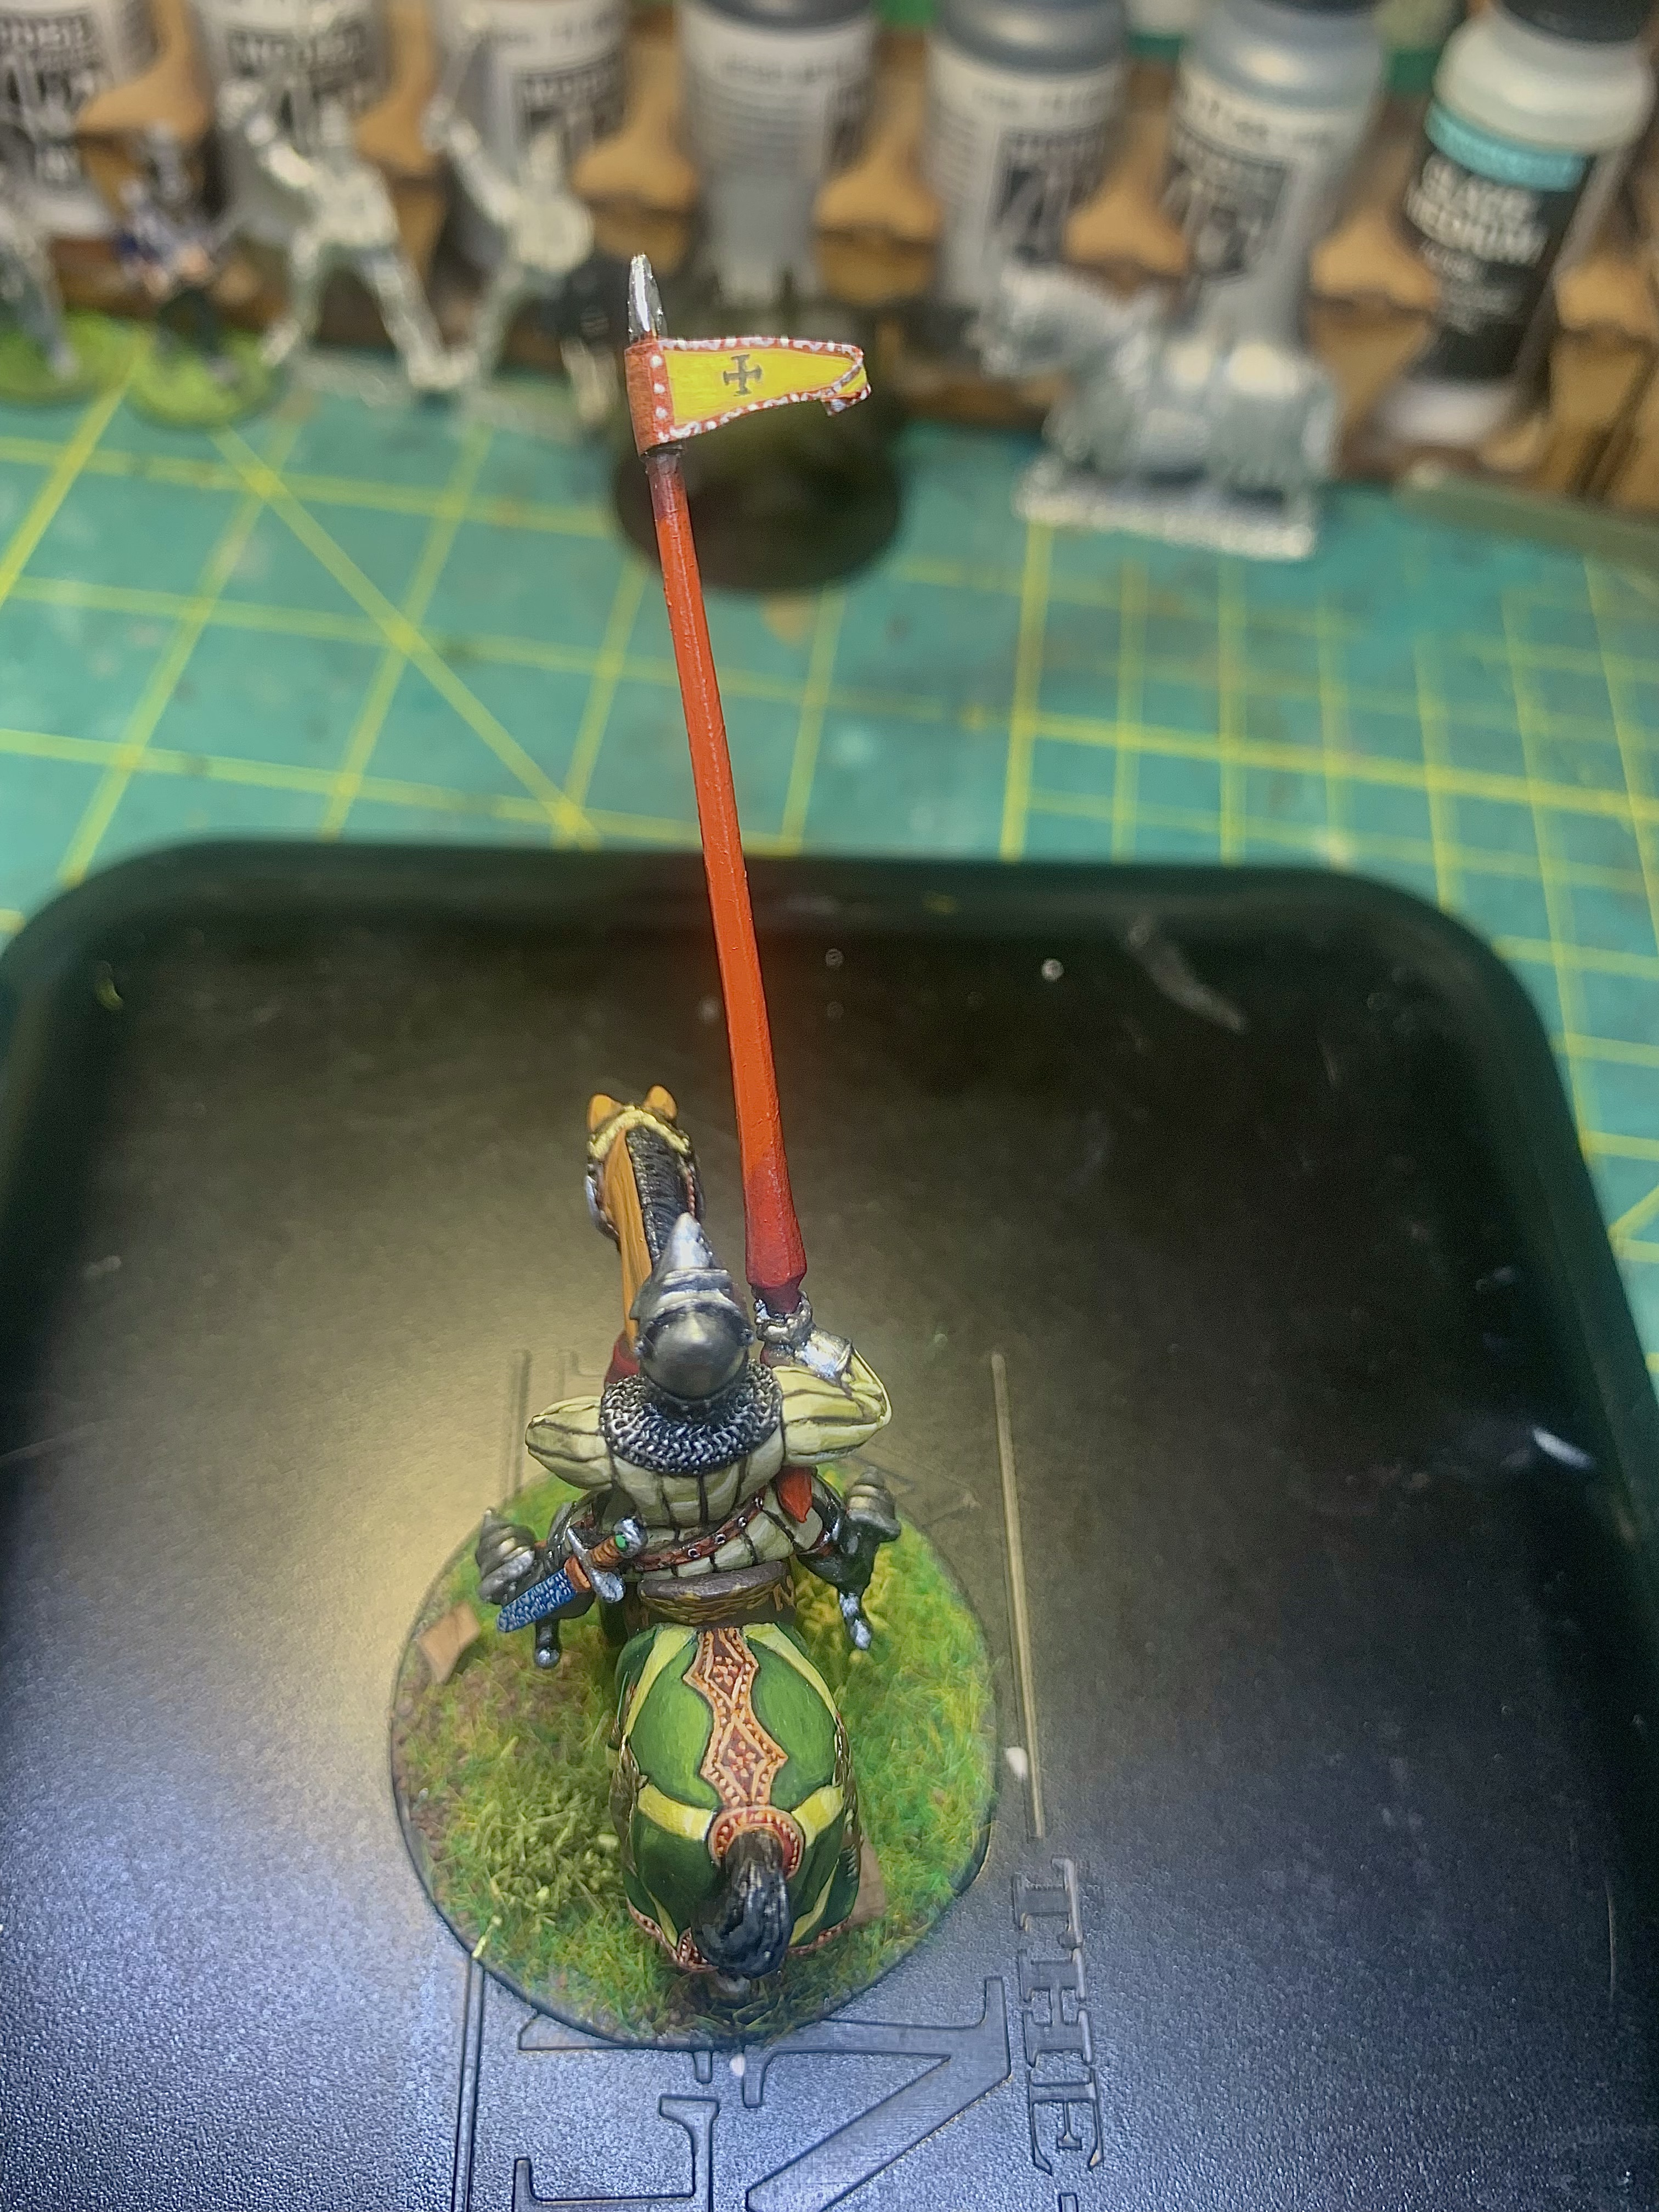
| Added lance pennant and finished! | | | |


Exquisite work, Mike! Something not to be attempted by mere mortals like myself.
ReplyDeleteThank you Jonathan but my hope is to encourage others when putting up these posts. However I assure you I am just as mortal as anyone. The gods are far away up there in their pantheon. If you’d like to see one at work look up Olga Kropotova on YouTube. Her work (admittedly in 54mm scale) is waaaaaaay beyond belief.
DeleteBeautiful (of course!) what really interests me are your initial ‘marks’ such as shown on the left of the coat in picture 1. The marks are made and your artists eye already knows where it is all going and how it will be developed from that sub-structure …. Fascinating.
ReplyDeleteThank you Norm. Unfortunately I missed taking pics of the earlier steps but I think it’s still clear what the early model looked like. Like any other construction the foundations are paramount and those sketches give the sense of scale and proportion of the final result. You will note that the rear caparison quarters are larger than the front ones so there has to be size compensation to maintain proportion. Also the right and left sides are mirror images so it would be rather rash not to sketch out the design before starting off. The first version is usually a stick figure which is then gradually filed in and detailed.
DeleteSplendid miniature! It’s amazing how much detail you can put on these figures. I’d couldn’t even attempt such fine lines. 😀
ReplyDeleteThanks for visiting Stew! As with anything, practice makes perfect. You start with basic heraldic symbols such as crosses or linear patterns and move on from there. In time you get the hang of it. Having said that, I still have loads and loads to learn.
DeleteGorgeous heraldry, mine stops a stage or two before yours! The St Andrews cross was a good idea , as was keeping the Man at arms relatively simple, lovely work all round!
ReplyDeleteBest Iain
Your minis are gorgeous too Iain. And numerous! I wish I had half as many figures in my collection!
Delete